


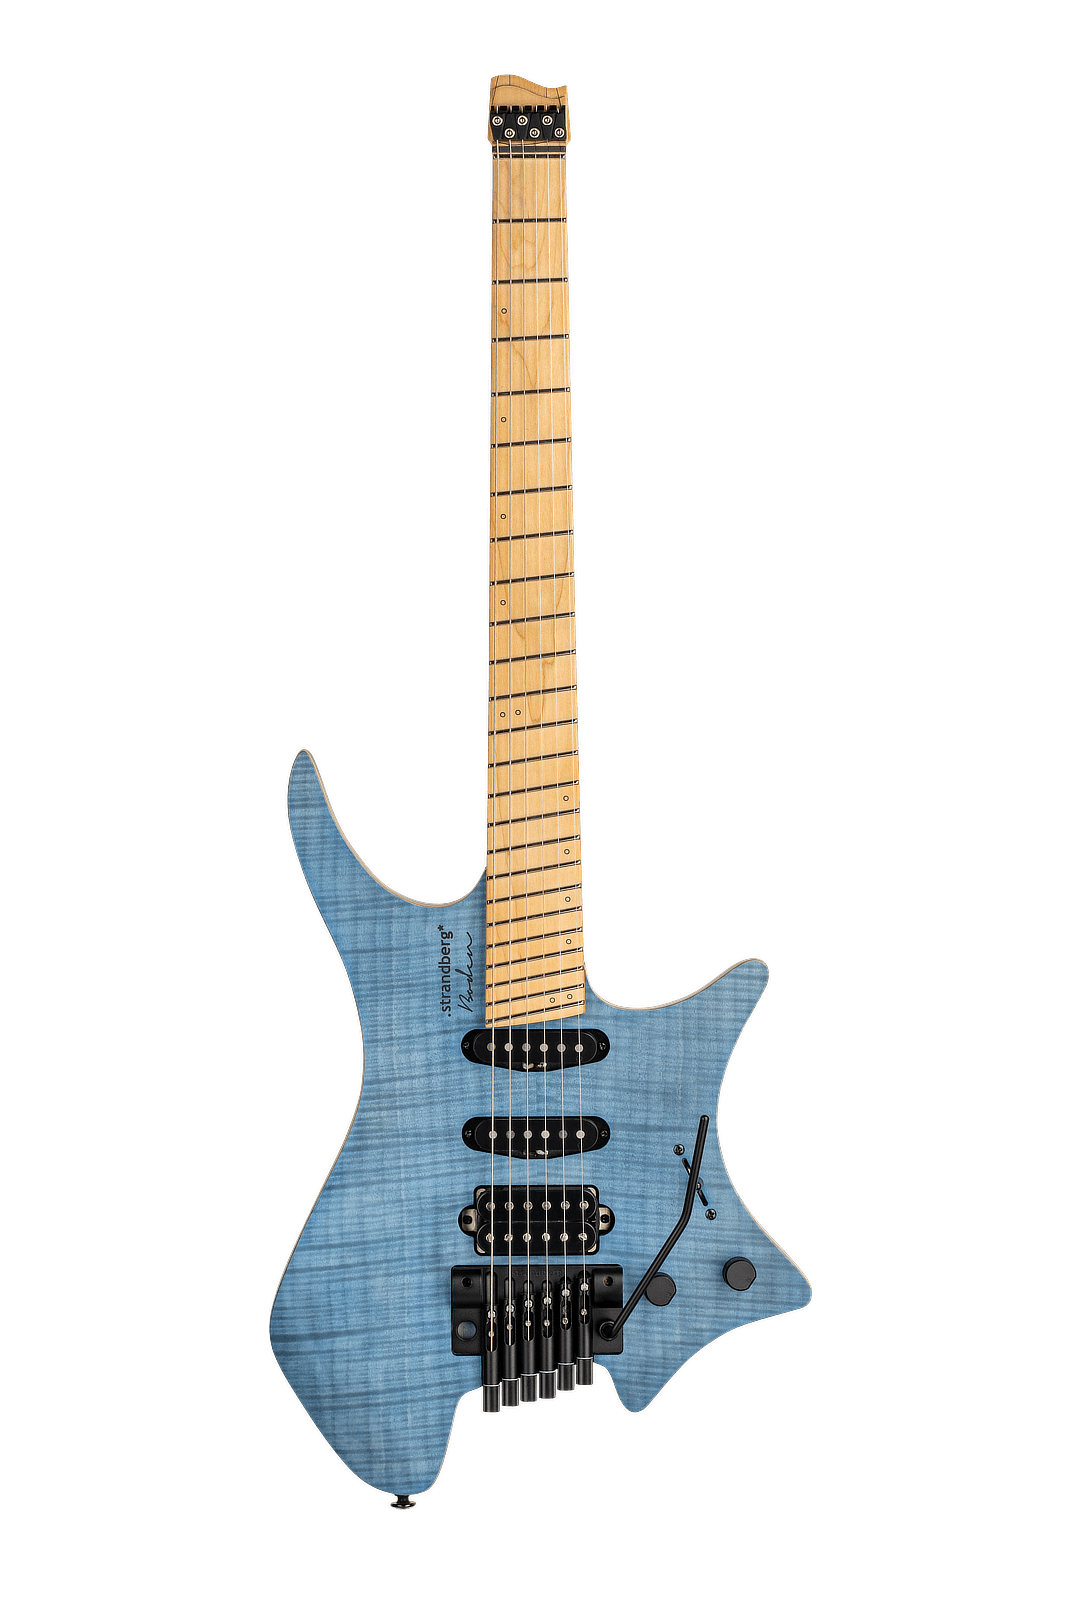
When is the EGS tremolo bridge properly set up?
The answer is actually pretty simple although there are many caveats. The bridge is properly set up when its baseplate is level with the guitar body (with the correct strings tuned to the correct pitch!) and the tremolo action feels good to you. Even though one would wish that mechanical parts like these had intelligence of their own, the truth is that one must balance the bridge manually whenever changing either string gauge, string type, tuning or anything else that makes the combined tension of the strings different than before. For this reason, a floating tremolo bridge is not well suited for frequent changes in tunings and a string change is most effectively done one string at a time as described in this previous article.
Normal string changes
When you simply replace the strings with fresh strings of the same brand and gauge, your action and bridge angle should be identical to what it was before. If you find that it isn’t, here are some possible steps to troubleshoot:
| Symptom | Cause/action |
| Strings sit high off the fretboard and baseplate is leaning forward | The tremolo was set up to balance in the low position and is now sitting high. Release string tension and push the tremolo down to re-seat. |
| Strings sit very low and baseplate is leaning backward | The tremolo was set up to balance in the high position and is now sitting low. Release string tension and pull the tremolo up to re-seat. |
| The tremolo base plate is leaning towards one side, and the bass or treble strings are much higher/lower than the others | The tremolo might be resting in the high position on one side and in the low on the other. Release string tension and ensure that it is seated in the same position on both sides. |
| Strings are protruding at the rear of the tuner or don’t reach the required pitch | The string was installed without string tension and/or the baseplate is leaning backwards and there wasn’t enough range in the tuner to both pull the bridge up to horizontal level and tune the string to pitch. With the tremolo balanced, unscrew the tuner all the way, release the string lock, and remove the slack of the string before locking it again. To avoid this problem, block the tremolo during string changes. |
| Tremolo doesn’t return to pitch after use | The most likely cause is that it is not centered and the base plate touches the sides of the tremolo recess. Follow the instructions in this support article to correct. |
| Tremolo doesn’t pull up | The most likely cause is that the mounting screw for the tremolo arm has become disengaged. Follow the steps in this support article to correct. |
Bridge angle setup after changing tuning or string gauges
The quickest way to make adjustments like changing tuning or string gauges to a guitar with a floating tremolo system is to block the tremolo while making the changes. (Remember that you have to adjust the intonation after changing string brand or gauges.) This support article describes the process in a condensed way, but for more details, read on.
There are several ways of blocking the tremolo. The goal here is to work around the floating tremolo otherwise moving with each change of tension. Find a hard object the same thickness as the gap between the bottom of the tremolo base plate and the guitar body, for example a stack of picks. Squeeze the picks (or other object) in under the tremolo base plate, and tighten the tremolo spring claw to increase the backwards pressure of the tremolo base plate. The bridge is now unable to move, and you can work on the guitar as if it had a fixed bridge. When you are done, take out the stack of picks/object and balance the tremolo by adjusting the springs as described below.
When you remove the picks/object and adjust the spring claw back to where it was, you will end up with a bridge that’s either level with the guitar body, leaning backward, or leaning forward. If the bridge is level with the body, then everything is good to go. This would be the common scenario when changing strings and keeping the same brand, type, gauge and tuning. If the bridge is leaning backward, it means that the combined tension of the strings has been reduced. This usually happens when tuning down or changing to lighter gauge strings but there are other possible scenarios as well. To restore balance, the spring tension is reduced by loosening the spring claw screws until the bridge is level again. Adjustments are done little by little, tuning with each adjustment – or in the case of having had increased the spring tension to block the tremolo – until you are back in tune. If the bridge is leaning forward, it means that the combined tension of the strings has been increased and the situation is solved in the same manner as before but by tightening the claw screws to increase the spring tension.
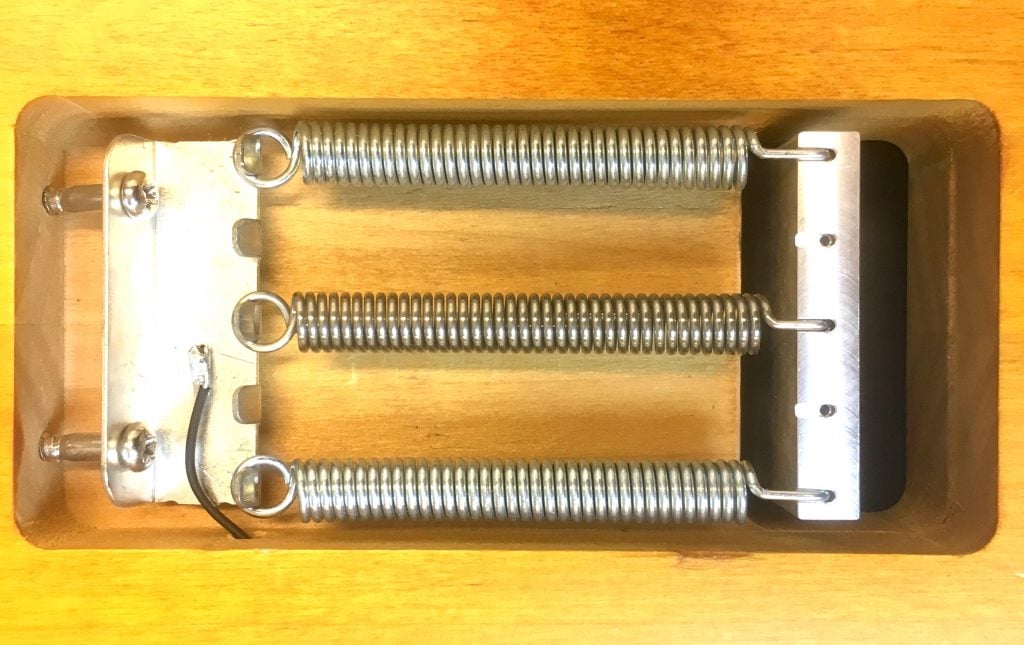
Every once in a while, the range of spring tension given by a particular number of springs is not enough. Perhaps the springs are already at their maximum tension and the bridge is still leaning forward or perhaps it is the other way around. Either way the solution is to remove or add springs until a sufficient range of tension is obtained.
When adjusting the tremolo bridge, you might find that repeated tuning is necessary to obtain the correct bridge angle at pitch. This is perfectly normal and is a result of tuning one string at a time on a floating tremolo unit. When tuning one string, the bridge will shift slightly and therefore cause the other strings to go out of tune. The same phenomenon occurs when breaking a string or intentionally changing tuning. Don’t worry though, you will eventually get there.
String height setup
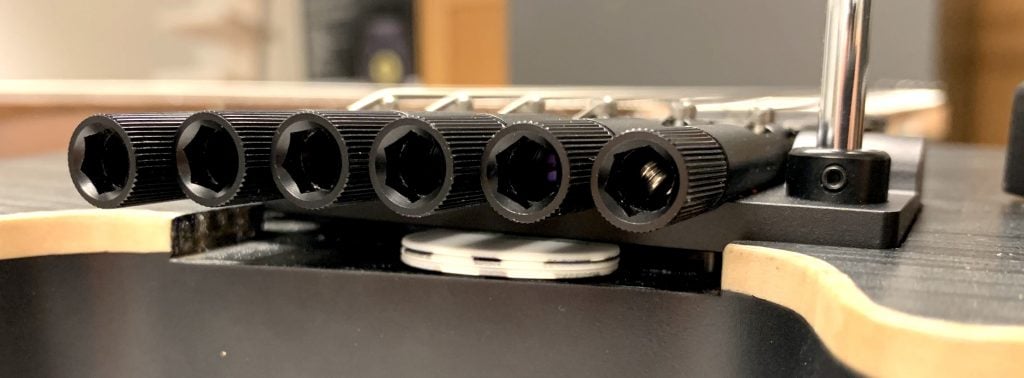
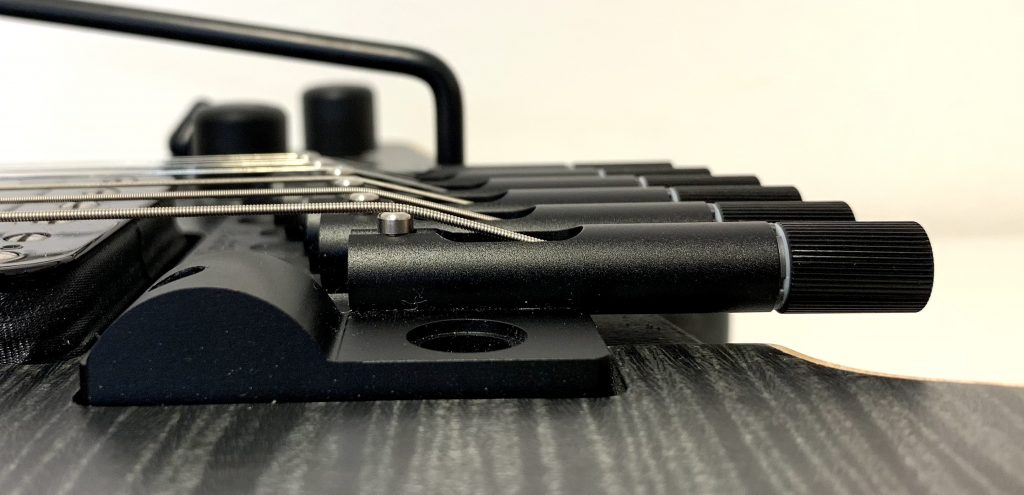
The EGS series 5 tremolo allows for two ways of getting the string height just right. One is by turning the two large pivot screws on which the tremolo unit rests. This is done by means of a 4 mm hex wrench and is best done while the string tension released. Adjusting the pivot screws raises or lowers the whole unit while keeping the relative individual string height intact. The other way to adjust string height is by raising or lowering the individual bridge saddle adjustment screws on which every string rests. This is done by loosening the string slightly, lifting it off the screw, loosening the saddle locking screw (0,9 mm hex) and turning the saddle screw until the desired height is obtained. When the perfect height for that particular string has been found, the saddle locking screw is tightened again.
The two adjustment methods are used together to achieve the perfect setup for every player. As this allows for a vast number of possible setups, one must bear in mind that equal string height can be achieved in different ways. One can either have the individual saddles set lower and the tremolo base set higher or vice versa. If the player for instance desires the broadest possible bending range from the tremolo, it is well advised to set the individual saddle screws lower and raising the tremolo base as this will give the unit additional space for movement.
Then why all these options? Why not just have a preset height of the individual bridge saddles that matches the radius of the fretboard which would make height adjustments easier?
We could do that but it would greatly reduce the possibility of achieving a setup that perfectly reflects the taste and playing style of every player. Every situation is not compatible with a setup where every string has the same relative height above the fretboard. Most players tend to hit the lower wound strings harder than the high ones which commonly leads to a higher level of string buzz coming from these. In such cases the possibility of having the lower strings set higher is most useful while low action may be kept for the plain strings for lead playing.
Action and feel
When it comes to the feel of a floating tremolo system there are many different factors that affect the final results. On the EGS series 5 tremolo system we have tried to achieve a smooth feel with a balanced torque of pitch alteration that is not too gradual nor too extreme.
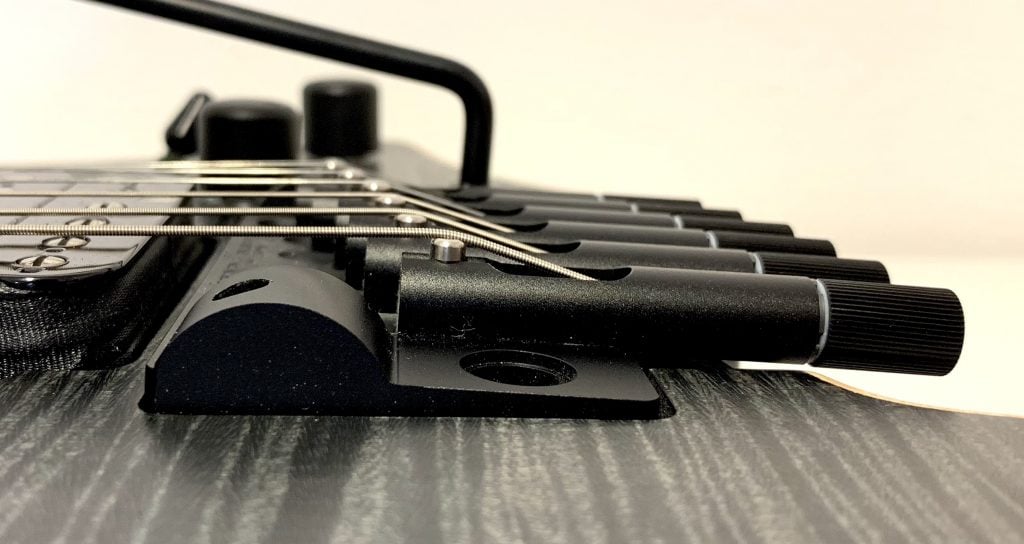
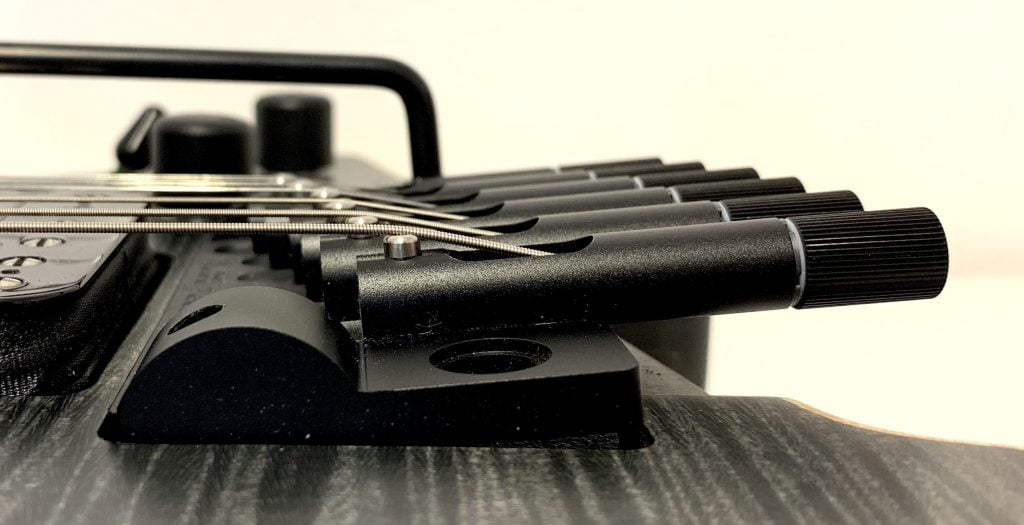
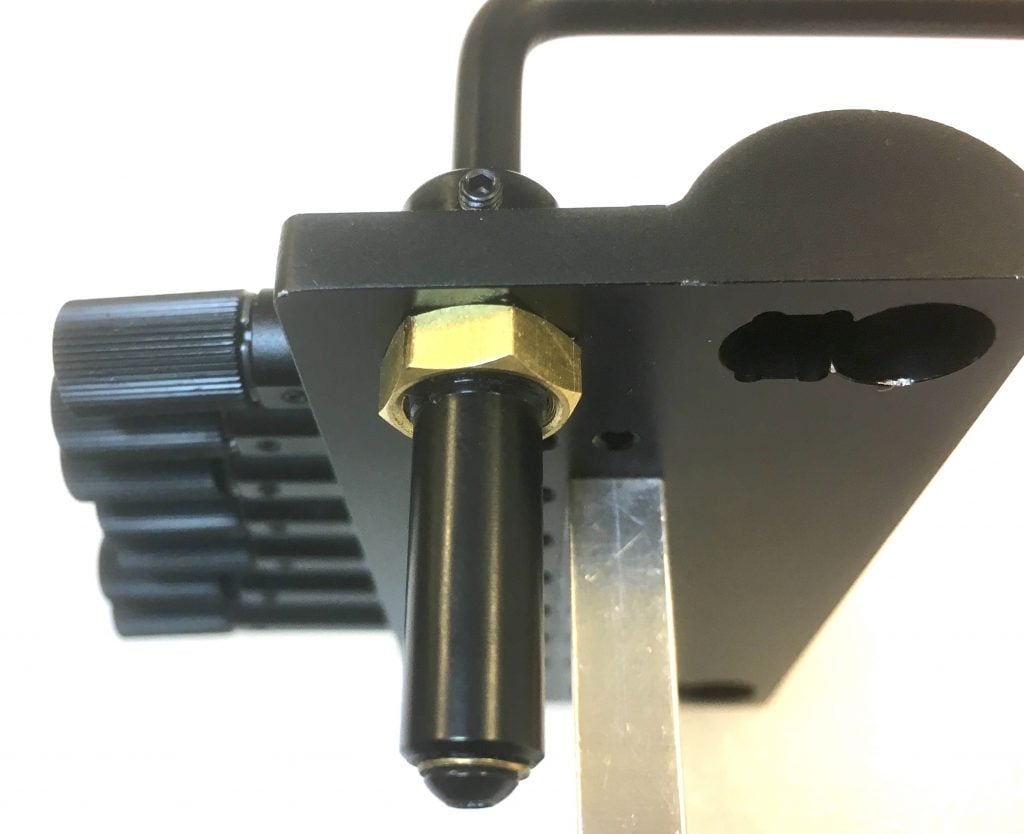
Even when it comes to the action of the tremolo, we have included room for adjustments even though this is not something that should be experimented with on a daily basis. As mentioned before, the tremolo base plate rests on two large pivot screws in its balanced position. It does so by means of notches or grooves on the base plate that allow the bridge to rotate around the screw. There are two sets of notches on different heights in regard to the strings and either pair may be selected to tailor the action of the tremolo.
If seated on the higher pair of notches (the bridge seated deeper into the body), the action of the bridge will be more gradual with a smoother feel. If the other pair is selected, the action and pitch alteration will be more rapid and less smooth. The first option is the one we have chosen for the factory setup on all tremolo-equipped .strandberg* guitars.
Regardless of which pair of notches are used, it is of great importance that they are used in their intended pairs and not one from each. Such a setup will cause the bridge to behave erratically with insufficient up/down range and reduced tuning stability.
Erratic bridge behavior can often be traced to improper seating of the pivot screws onto the baseplate and can easily be solved by loosening the strings and tremolo springs in the back, after which the unit can be put back in its proper position. After the bridge has been positioned correctly, hold it firmly in place while putting the springs back and returning the strings to pitch. The procedure of re-seating the bridge is covered under the following support topic.
The tremolo arm
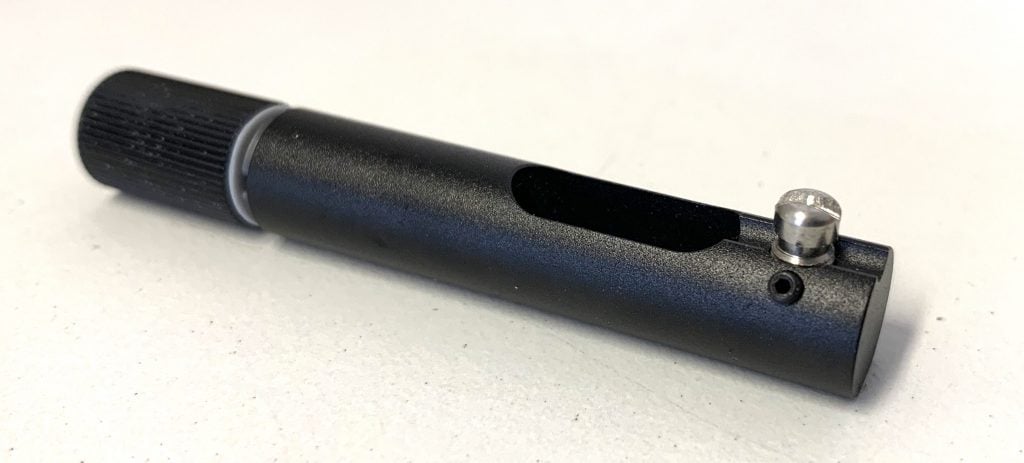
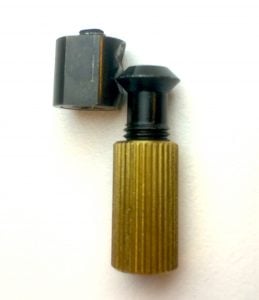
Does the tremolo arm really need its own chapter? Yes, we think so as the tremolo arm is such a vital part of the package and subject to many questions from our players. The arm sits in an insert that is separated from the tremolo base plate to allow for future exchange if necessary. This insert is equipped with two mechanisms to both secure the arm and achieve the desired stiffness/looseness of feel. At the bottom of the insert there is a M3 set screw that secures the arm in place as the arm is turned in clockwise rotation. Don’t turn too far or the screw will break! Always back off a full turn after reaching the end. On the top of the insert there is an adjustable gasket that allows you to fine tune the stiffness of the arm using a 1.5 mm hex wrench.
It is in, most cases, perfectly safe to leave the arm mounted to the guitar when putting the instrument in a case or bag for transport. Just be sure that the arm is facing in the direction of the neck so that the strings get looser from the pressure instead of tighter. If you prefer to have the arm removed in transport, that of course works fine, but it’s not necessary to do on a day-to-day basis.
If you’re experiencing problems with a tremolo arm that wont secure properly, please see:
https://support.strandbergguitars.com/article/68-my-tremolo-arm-keeps-spinning-what-can-i-do
https://support.strandbergguitars.com/article/67-my-tremolo-will-not-pull-up-what-can-i-do
A word or two about strings and tuning
The subject of strings and tuning deserves its own section of this article as they are a crucial aspect of floating tremolo bridge setup and guitar setup in general. Every possible combination of string brand, type and gauge at a specific tuning equals a unique combined string tension that pulls on the bridge. As long as the applied tension of the tremolo springs found on the back of the guitar body is equal to that of the strings, the bridge will be positioned level with the body. In all other scenarios it will not.
Whenever making changes in string choice or tuning, the combined string tension will change and the floating bridge will shift. To avoid time consuming maintenance work, it is therefore a good idea to gain an idea about the impact of certain changes in strings and tuning on the combined string tension.
One common scenario is to tune a guitar equipped with 10-46 gauge strings down from Standard E tuning down to Drop-D without changing strings.
In the case of a .strandberg* guitar with 10-46 gauge factory strings, the combined string tension at 440 tuning is 100.12 lbs or 46.4 kg. If the low E string is dropped down to D, the combined string tension is lowered by 3.47 lbs (3.47 %). The tension reduction causes the bridge to lean backward and the remaining five strings to go slightly sharp. If the string gauge had been changed accordingly at the same time as the tuning, the change in tension may have been less prominent. If a 52 gauge string of the same type was used in the same scenario, the change in combined tension would only have been 0.14 lbs (0.14 %).
Another example is tuning a regular 6-string .strandberg* guitar down to Standard B. If we in this case shift the same string set down one whole string and add a 56 gauge string for the low B, the combined string tension will be 99.54 lbs or 45.15 kg when using the gauges 13-56. This is 0.58% lower than the 10-46 gauge strings tuned to Standard E. This example is meant to illustrate the mistake in thinking that heavier gauge strings automatically means higher tension and more applied strain on the neck and bridge of the guitar. All strings of all types and gauges achieve a certain tension at a certain pitch and this is something that can be measured to predict the correct string choice for a desired tuning.
Please bear in mind that the scale length of each string has a prominent effect on the tension and that the design of the string itself may very well be different from one manufacturer to another.
One source of string tension at pitch calculation is the String Tension Pro application available online:
The physiological aspects
A balancing act
The term “floating” in the description of a tremolo bridge refers to the fact that the bridge is floating freely in space on behalf of two balanced opposing forces. These two forces consist of the strings pulling in one direction and the tremolo springs found on the back of the guitar body pulling in the other. A floating tremolo bridge basically works in the same way as a seesaw which means that a neutral and balanced position can only be reached by equal applied force on each side. The pitch alteration then occurs as a result of applied pressure on the tremolo arm. As long as the bridge is properly balanced in its neutral position, our EGS series tremolo will allow the player to alter the pitch both up and down with minimum friction and impeccable tuning stability.
Please just don’t ask it to stay in its level position when breaking a string or changing the tuning of the guitar. This is simply not possible given the laws of physics and the design of the EGS series 5 tremolo system.
Construction and design
Our tremolo bridges and all their components are constructed from the same aircraft grade Aluminium and stainless steel as our hardtail bridges which ensures strength, durability and low weight. The design relies on “knife edges” made from hardened steel which means that the baseplate rests on two pivot screws as the only points of contact between the bridge and the guitar body. Knife edge tremolos are common on the market as these have a torque and feel popular among guitar players and also allow for relatively easy maintenance work and setup.
As mentioned before, a floating tremolo bridge relies on the balancing of the two forces in play and for this reason the tremolo block of the EGS tremolo allows the use of 1-5 springs to counteract the force of the strings. No number of springs is optimal for any situation and these may be used in different combinations to achieve a desired result. As a rule of thumb, a lower number of springs with higher individual tension will yield a smoother response compared to a higher number of springs with lower individual tension.
The tuners on the EGS 5 tremolo bridge are identical to those found on the hardtail counterpart and employ the same spare parts.
Intended use
In this final section of the article, we want to round off by briefly explaining what the EGS series 5 tremolo system is intended do and not do. The basis for successful tremolo bridge construction is the elimination of friction causing impaired tuning stability and a less smooth feel. As rule of thumb, the friction between surfaces will decrease if the point of contact is as smooth and as small as possible, which had led to the EGS tremolo design that is found on our guitars today. In designing the most accurate high-performance bridge that we can make, we are in the process presented with a dilemma of two partially incompatible characteristics, namely performance and durability. The EGS series tremolo is designed for impeccable performance within the boundaries of its design, but not to withstand abuse and force applied by various kinds of unintended use.
If string changes are done in accordance with our guides, moving parts are lubricated every now and then and setup and maintenance is done with care, the bridge will perform well under most circumstances. A .strandberg* guitar is a precise performance tool in the same manner as a Formula 1 car. Don’t take it for a spin in the woods!
Happy tremolo day to everyone!

Pin this image to save this article.


Share this: