


Tools
Before changing the strings on your .strandberg* guitar we highly recommend having the following list of tools on hand to make your string changing experience an easy one.
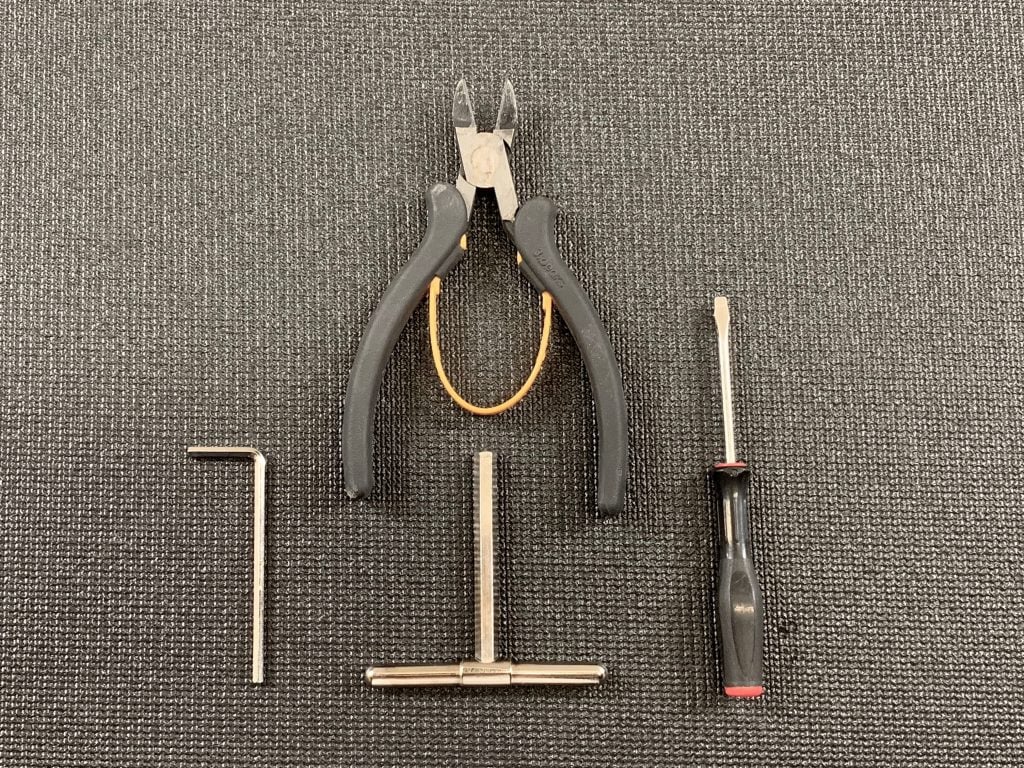
- Small Flat Head Screwdriver
- 6mm T Wrench
- 3mm Allen Wrench
- String Clippers
1. Loosen The Tension Of The String
To remove the old string, insert the 6mm T wrench into the end of tuner for the string that you want to change and turn counter-clockwise to loosen the tension of the it. You can also perform this task with your fingers however using the 6mm T wrench will make easier and faster for you.
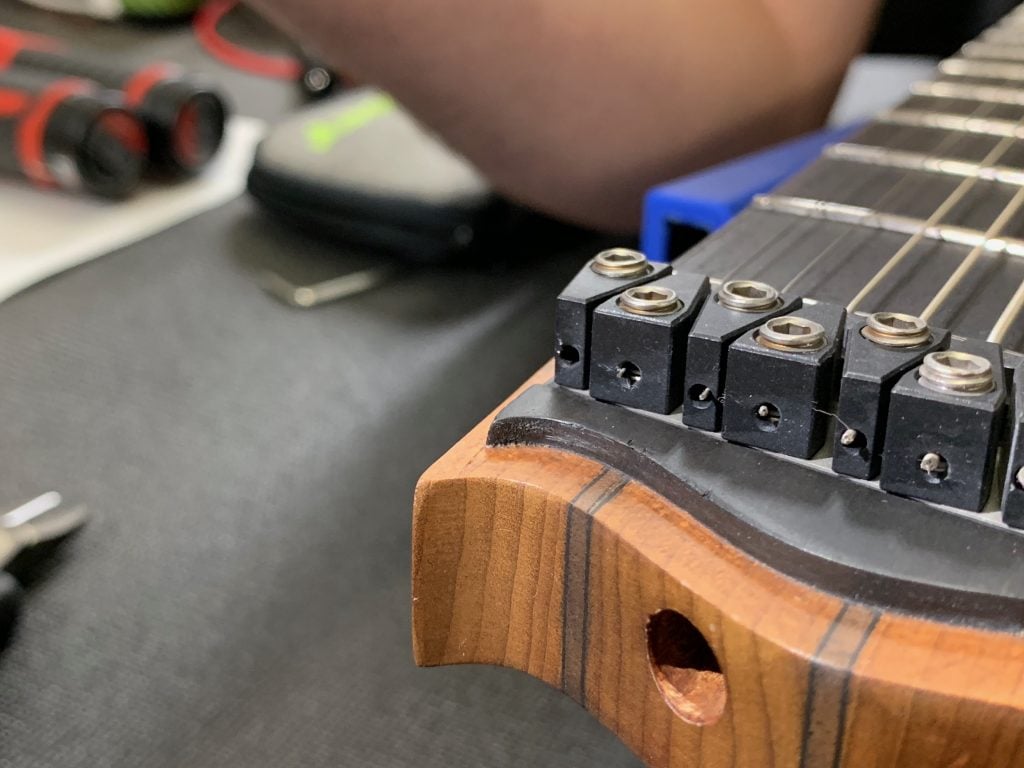
2. Loosen The String Lock
Once you have relieved tension of the string, use the 3mm Allen wrench to loosen the string lock and remove the old string from the nut.
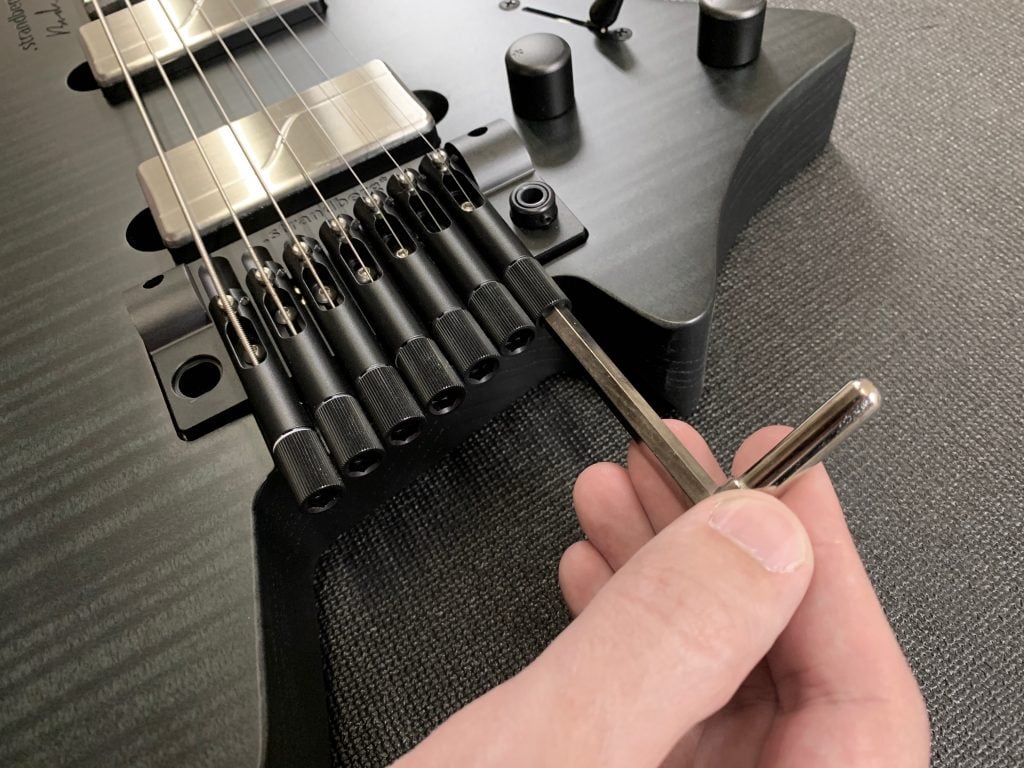
3. Remove The String From The Bridge
Now that the string is no longer locked use your hand to push the ball end of the string out of the bridge’s tuner assembly.
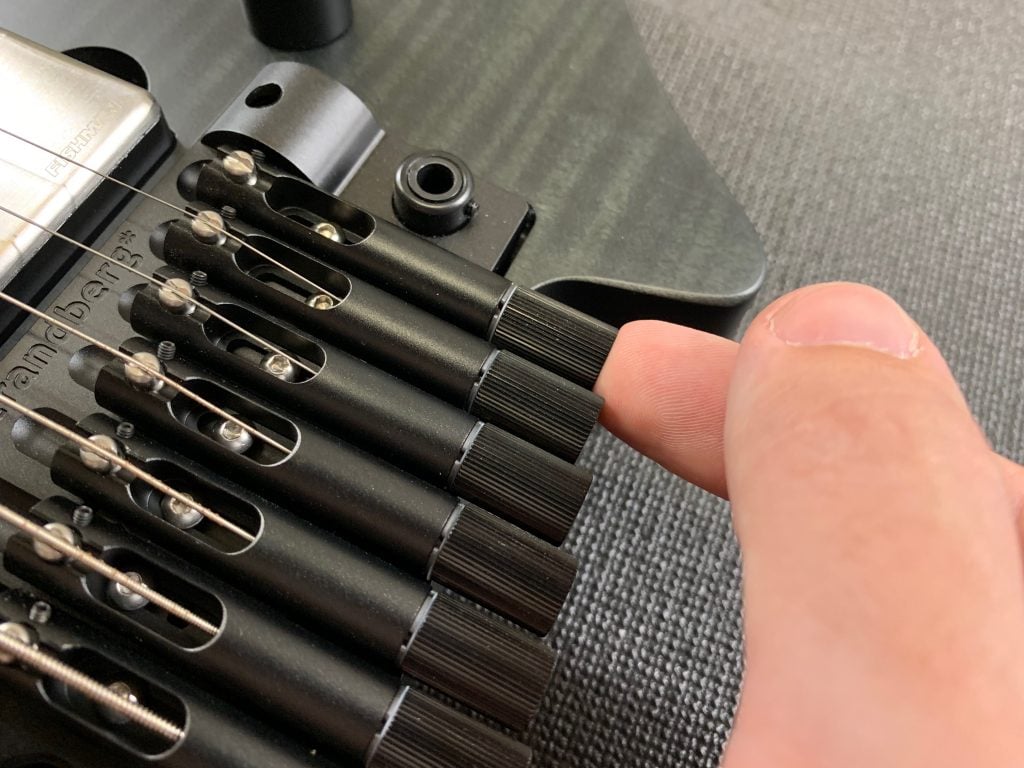
4. Prepping The Tuner
Before restringing we recommend prepping the tuner assembly to ensure you have a good range of +/- tuning after you lock down the string.
1. Remove the cap from the shaft of the tuner assembly with your hands by turning counter-clockwise.
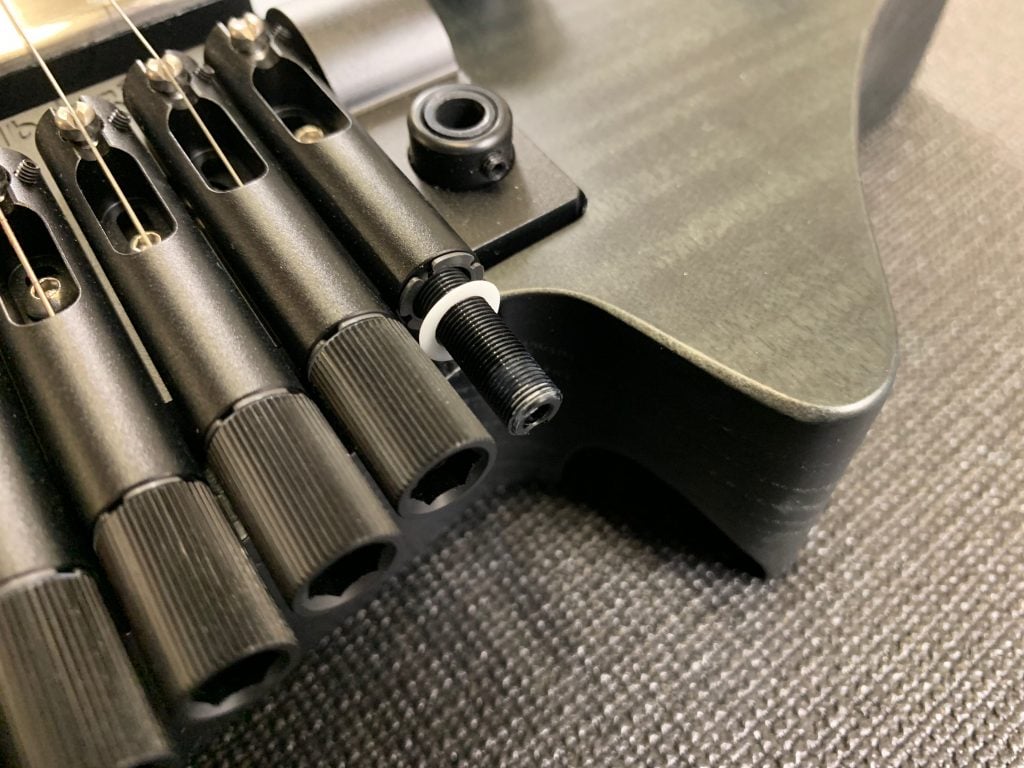
2. With your hands reattach the cap to the shaft of the tuner assembly using 3 clock-wise turns.
3. Once the cap is reattached, push the tuner shaft flush with the tuner assembly.
4. Now you are ready to restring.
5. Restringing (Bridge)
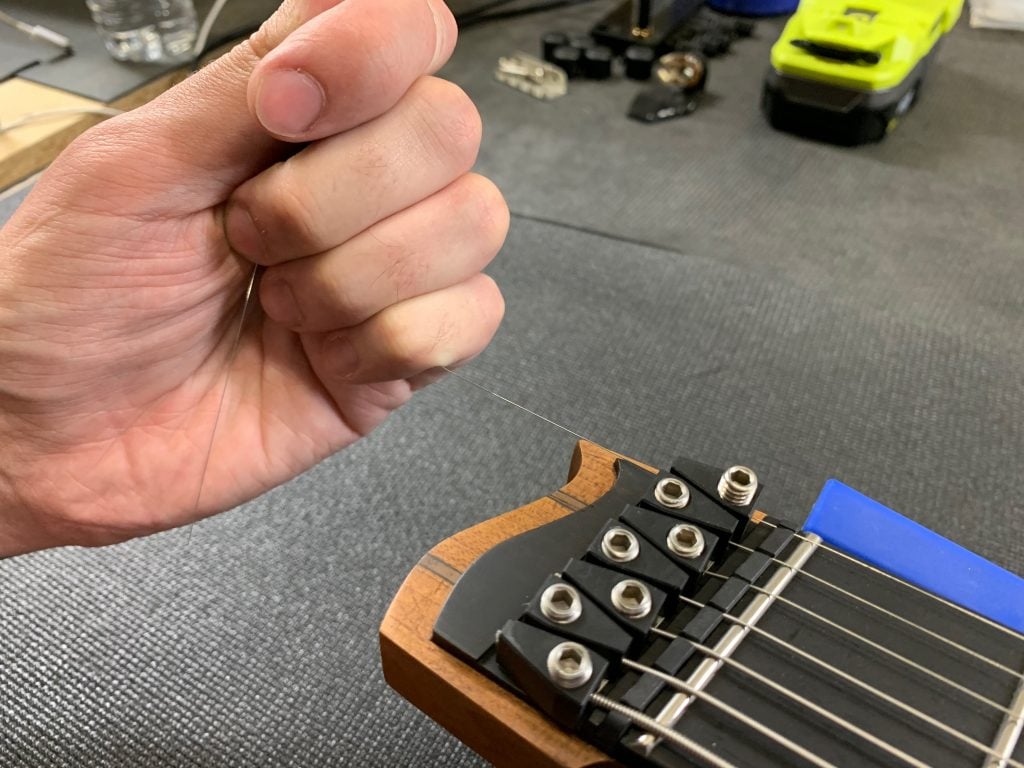
1. Take a new string and thread it through the cap of the tuner assembly.
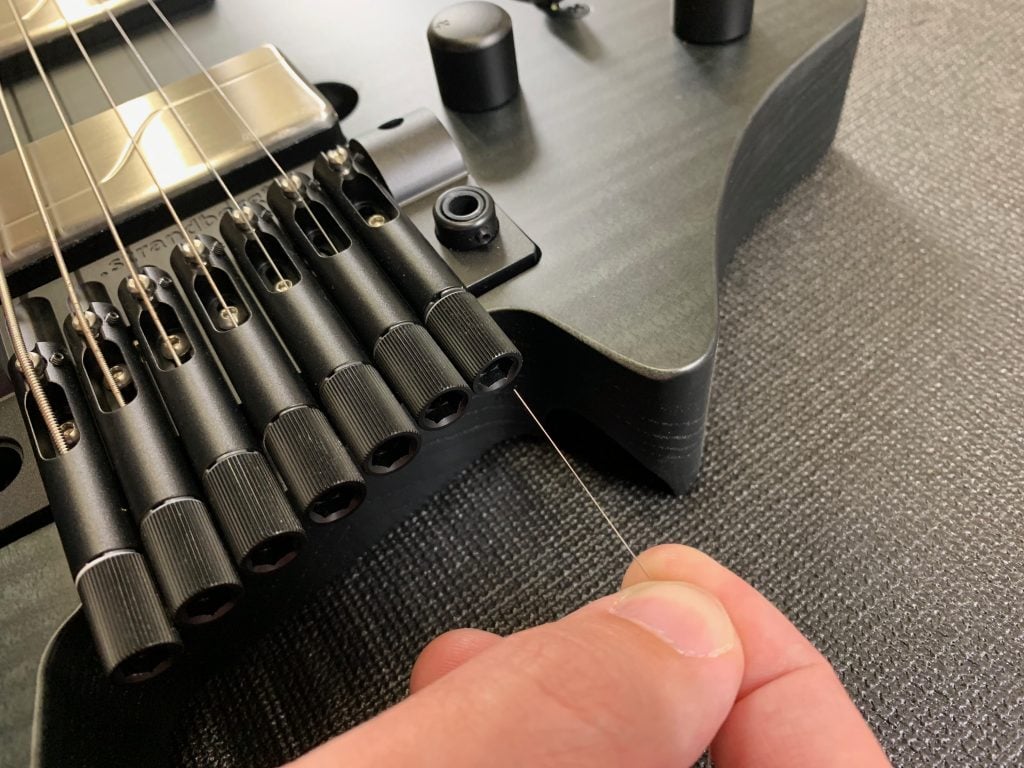
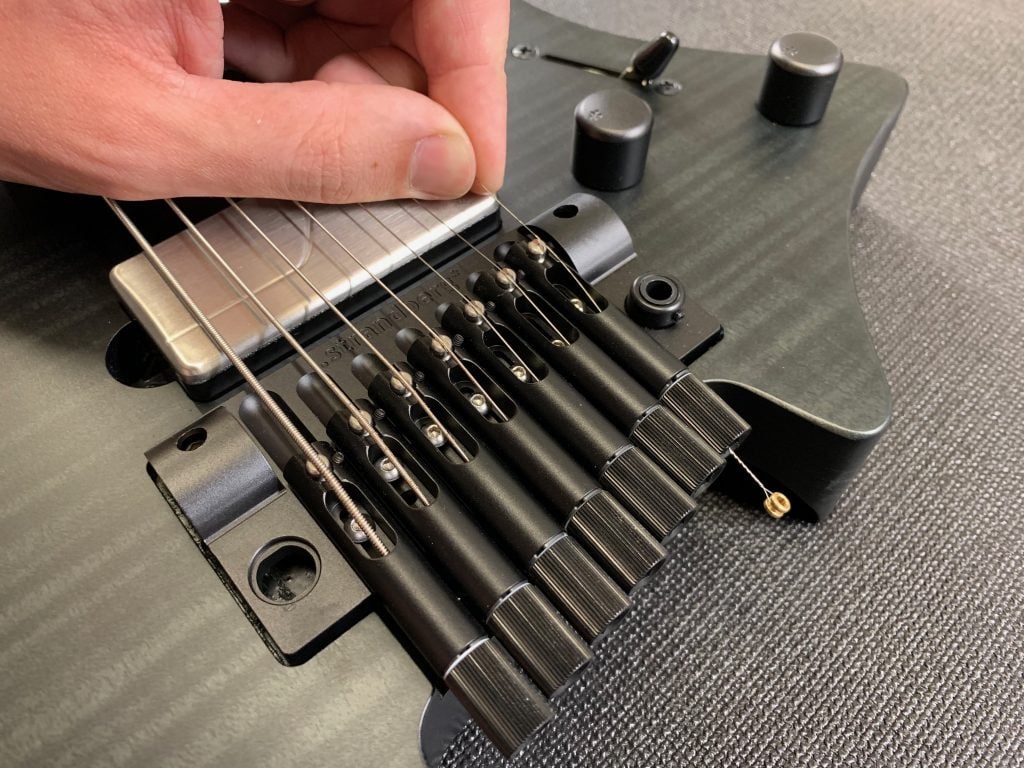
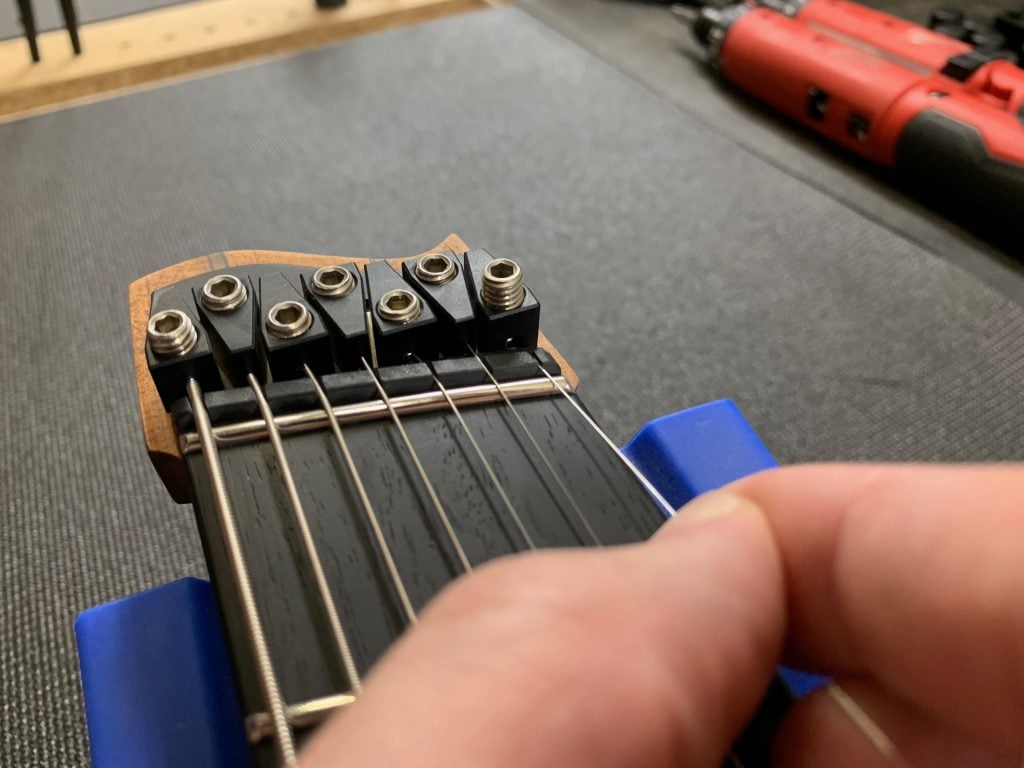
2. Using a small flat head screw driver, lift the string gently then pull it using your fingers and place it over the top of the saddle.
3. Now you’re ready to lock it.
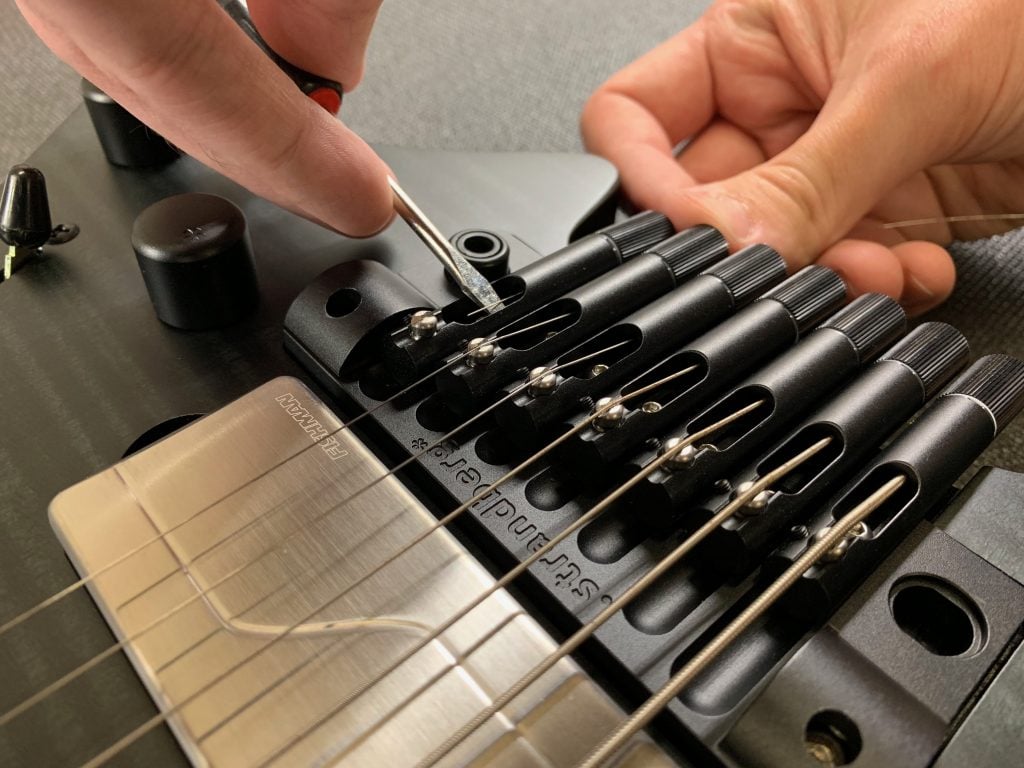
6. Restringing (Nut)
1. Thread the string through the opening of string lock.
2. Using your hand, pull the string straight and taught to ensure it is secured before tightening down the string lock.
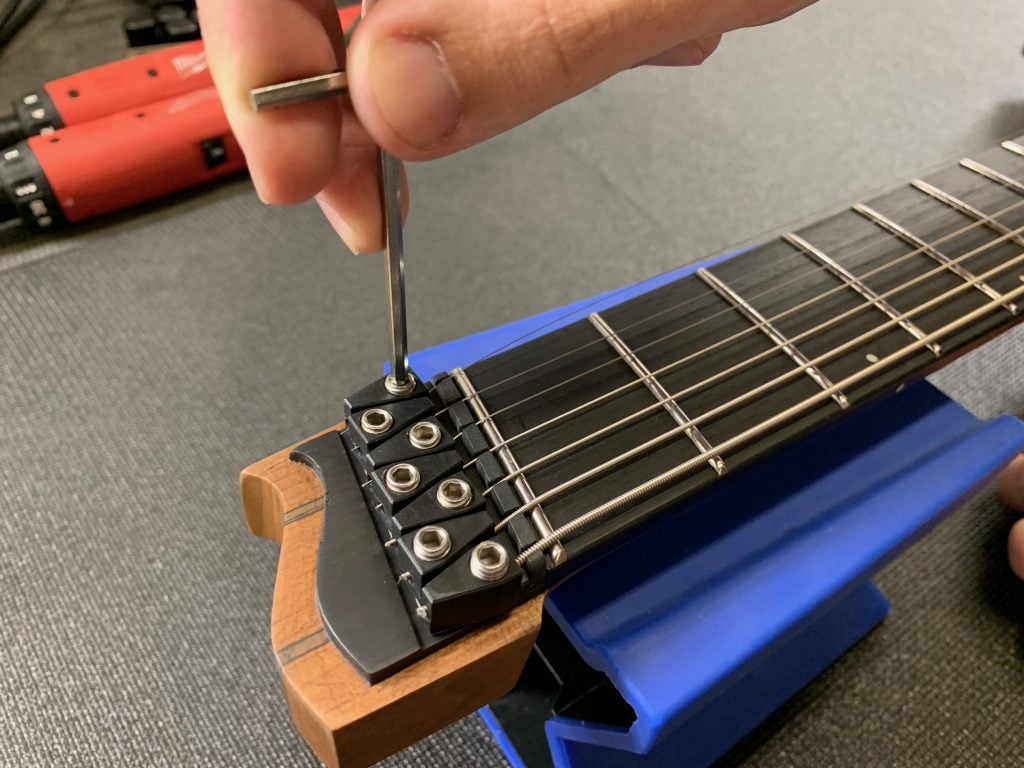
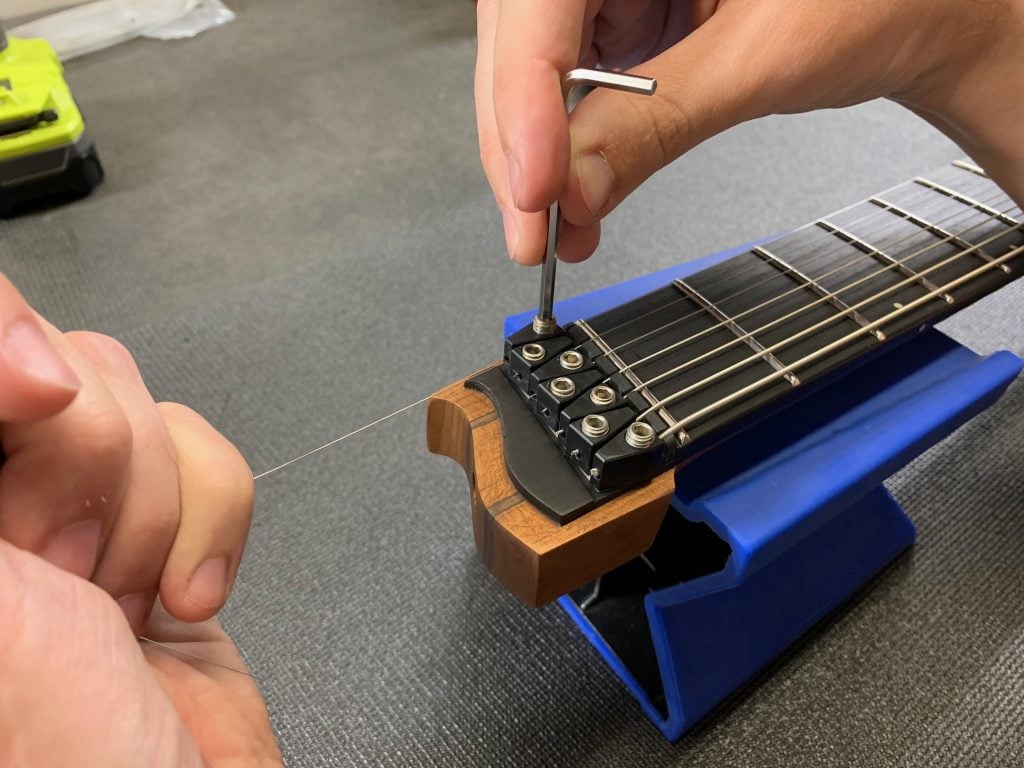
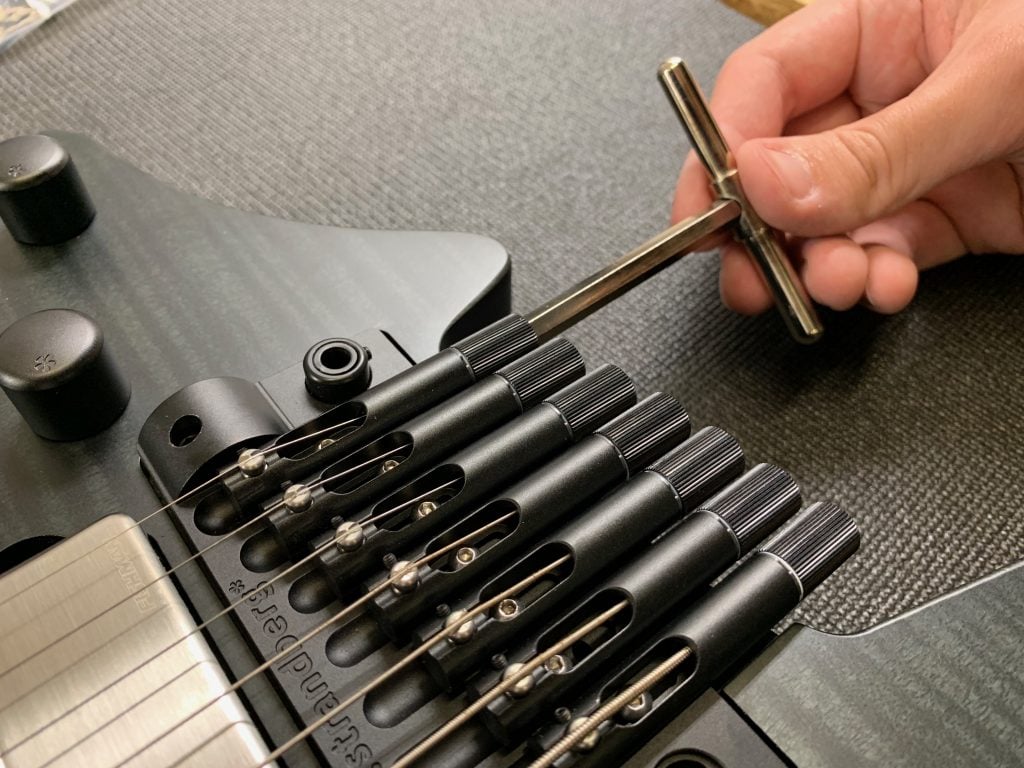
7. Tightening The String Lock
While holding the string straight, use a 3mm Allen wrench in the vertical position (shown) to tighten the string lock. Important: Be sure not to over tighten, as this may cause damage to the components of your instrument.
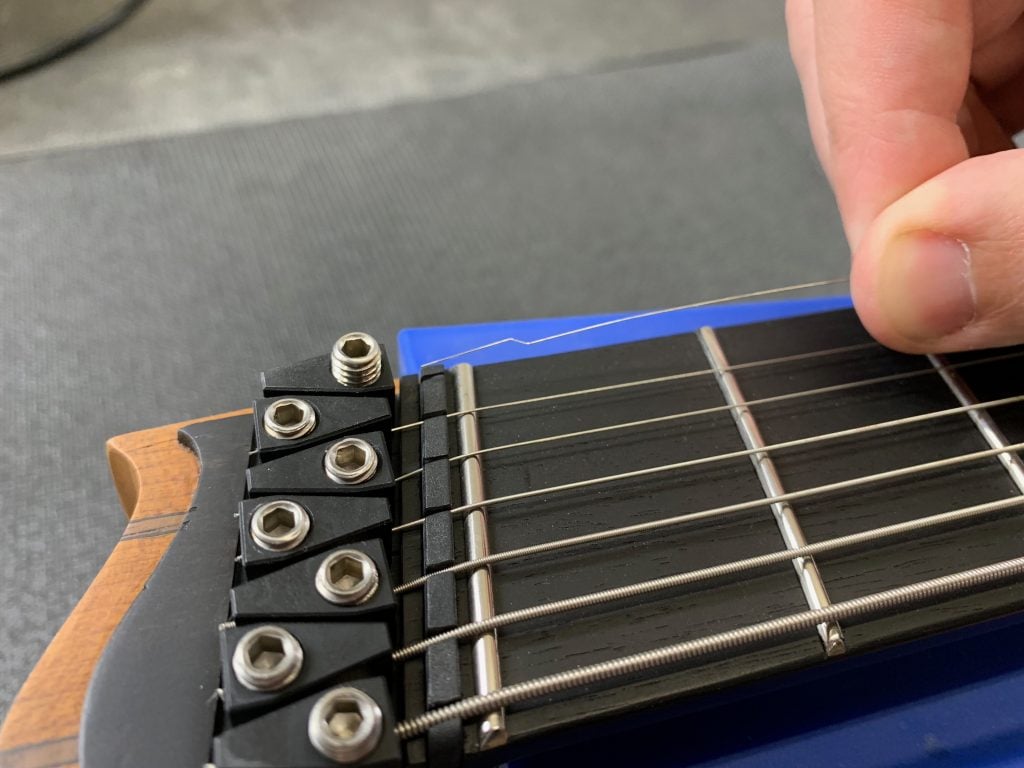
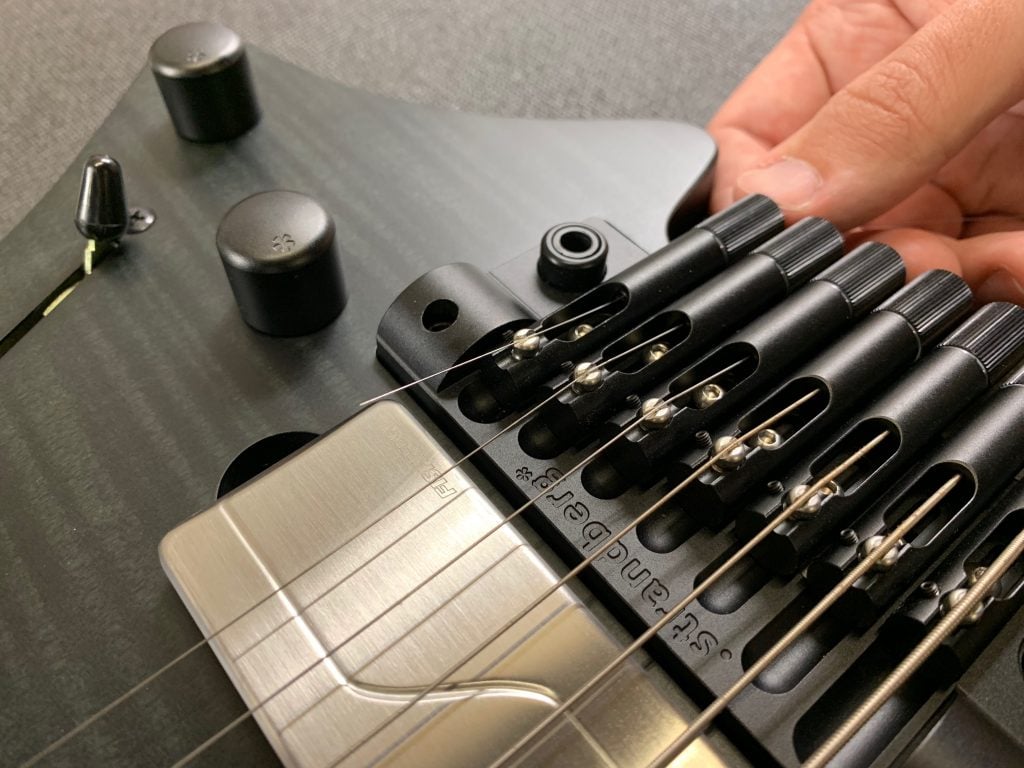
8. Clipping The Strings
Once the string is locked, position your string clippers flush with the top of the string locks and clip the string.
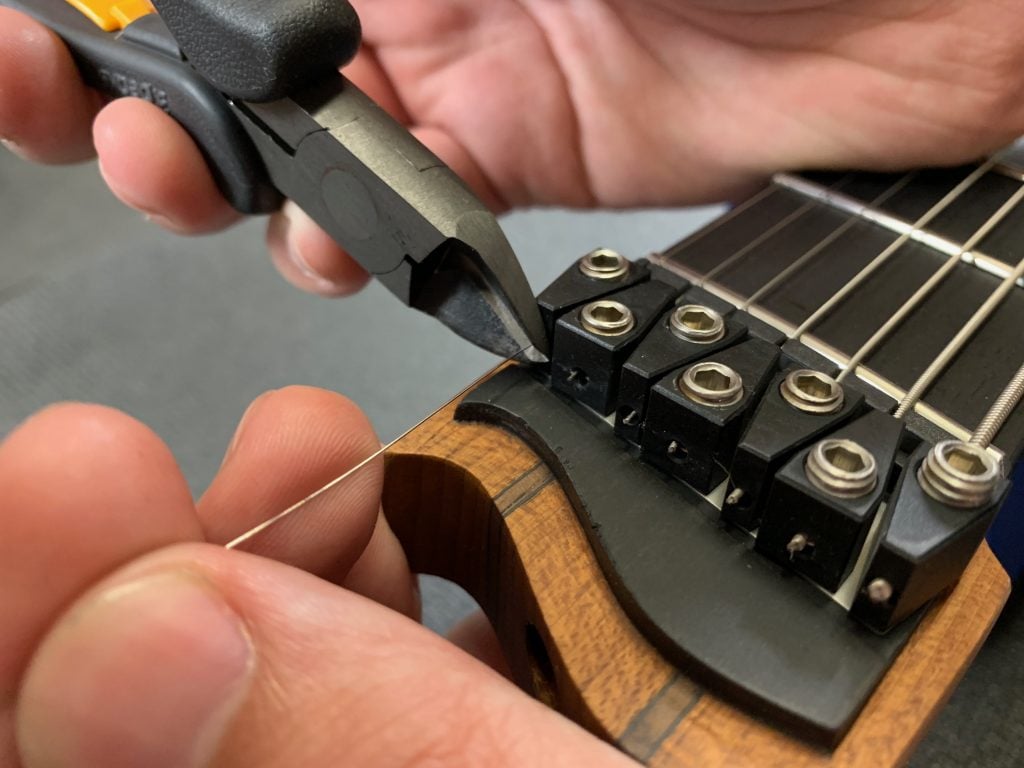
Using this clipping technique will tame the ends of the strings and provide a nice almost flat surface that reduces the chance of pricking your fingers.
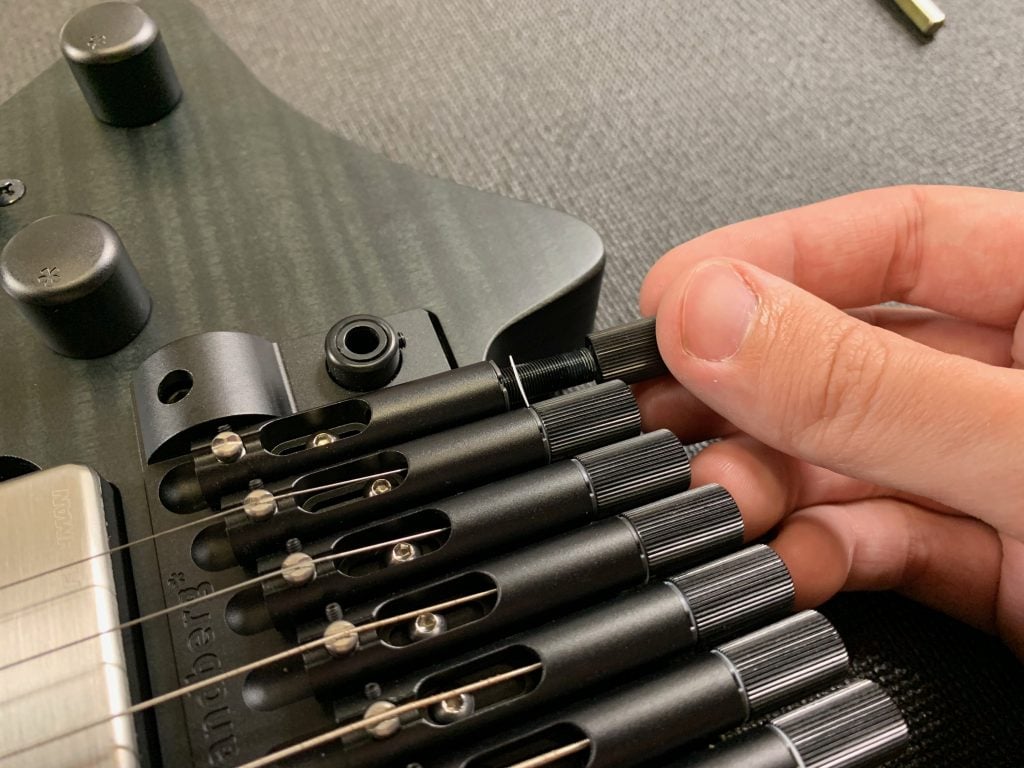
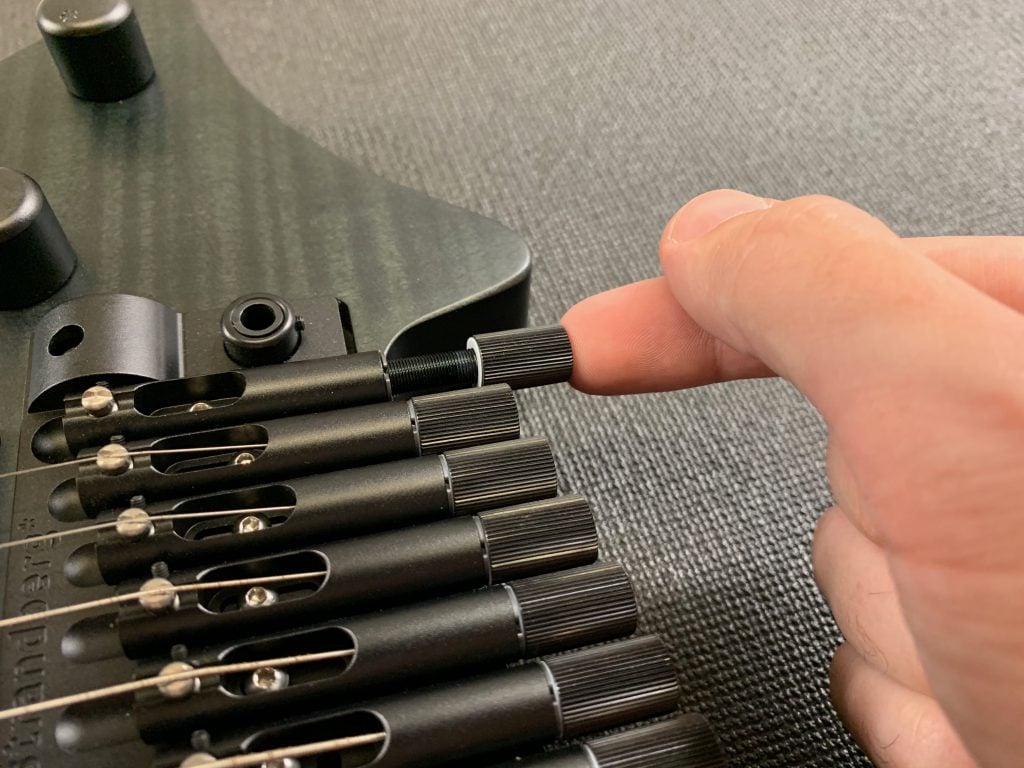
9. Tune Up
Use the 6mm T wrench to tune up the string, repeat for the remaining strings, and you are good to go.
We hope that this article was able to shed some light on restringing your .strandberg* guitar. Next time we will introduce you to the truss rod, it’s purpose, and How To Adjust it.
If you are wondering where to get a set of nifty string cutters like the pair used this article, they are available as part of our .strandberg* Deluxe Toolkit available through our web-store.

Pin this image to save this article.


Share this: