


- Make sure that the guitar is fitted with the strings you intend to use and that these are tuned to the desired pitch. The relief of the neck is a direct result of the strain applied by the strings and can not be set properly under any other circumstances.
- Press down the first and last fret simultaneously on the lowest string and observe whether there is a visible gap between the string and the 12th fret or not. A gap equal to the thickness of a business card means that the truss rod is setup correctly. A larger gap means that the truss rod needs tightening (clockwise turning of the truss rod bolt) and a lesser gap means that the truss rod needs to be loosened (counterclockwise turning of the truss rod bolt).
- Adjust the truss rod by turning the truss rod bolt inside the hole on the headstock by employment of the supplied 4 mm T Wrench – a quarter of a turn at a time – until the desired relief is obtained. Remember to tune the guitar in between turns as the tuning may be affected by an altered neck angle. If it is starting to feel “too tight”, STOP, and contact a professional. Repairing a damaged truss rod is very complicated.
If you wish to dive deeper into the anatomy of your .strandberg* EndurNeck and the functionality of it’s truss rod, please proceed to the full article below.
What is a truss rod?
A truss rod is a longitudinal support device inserted into the instrument neck to allow adjustment of the neck’s curvature in relation to the instrument body. This device commonly consists of a single or dual steel rod to which pressure is applied by the tightening of a threaded bolt at either end of the neck.
Why is a truss rod necessary?
To understand the need of a truss rod one must think about the strain that a guitar neck has du endure once strings are fitted and tuned to pitch.In this situation there are two opposing forces present that need to be properly balanced in order to achieve the intended performance from the guitar. In one corner we have the stiffness of the neck construction itself and in the other we have the combined force of the fitted strings.
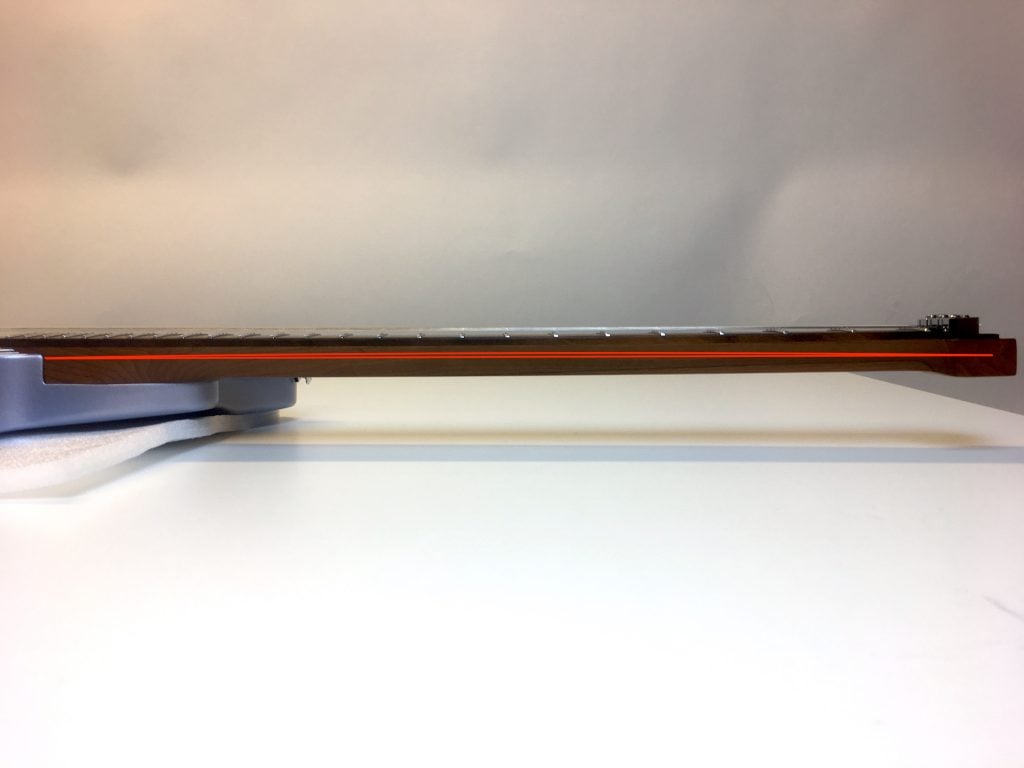
Depending on the force induced by the strings (gauges, tuning pitch etc.) the neck will bend accordingly and result in a particular curvature relative to the guitar body. The amount of curvature on the neck is commonly known as “relief”.
The neck bending in this way is not a bad thing. On the contrary, a certain amount of relief is necessary to allow the strings to vibrate freely as they are played. If the neck is completely straight there is not sufficient room for the string’s natural movement resulting in rapidly dying notes and excess string buzz. Too much relief will on the other hand make the instrument harder to play and have an adverse effect on intonation.
For this reason, an adjustable truss rod is fitted to the instrument neck to enable adjustments resulting in a healthy neck relief regardless of situation.
Why are then our instrument necks not manufactured with a fixed optimum relief?
There are several reasons for this which are best explained separately.
- It is not possible to put a fixed curvature on a wooden instrument neck that will remain unchanged regardless of strings and tuning. Every combination of strings and tuning equals a certain amount strain on the neck and therefore resulting in a unique situation in terms of relief. This is the first reason why the truss rod needs to be adjustable.
- Wood is a living breathing material that continuously move and change in relation to its surroundings. This constant state of movement is amplified by changes in temperature and humidity which causes the neck to move by itself and the relief to change seemingly unprovoked. As every moment in every location all over the world is unique in terms of temperature and humidity, the guitar neck will be to. This is the second reason why the truss rod needs to be adjustable.
How do I adjust the truss rod?
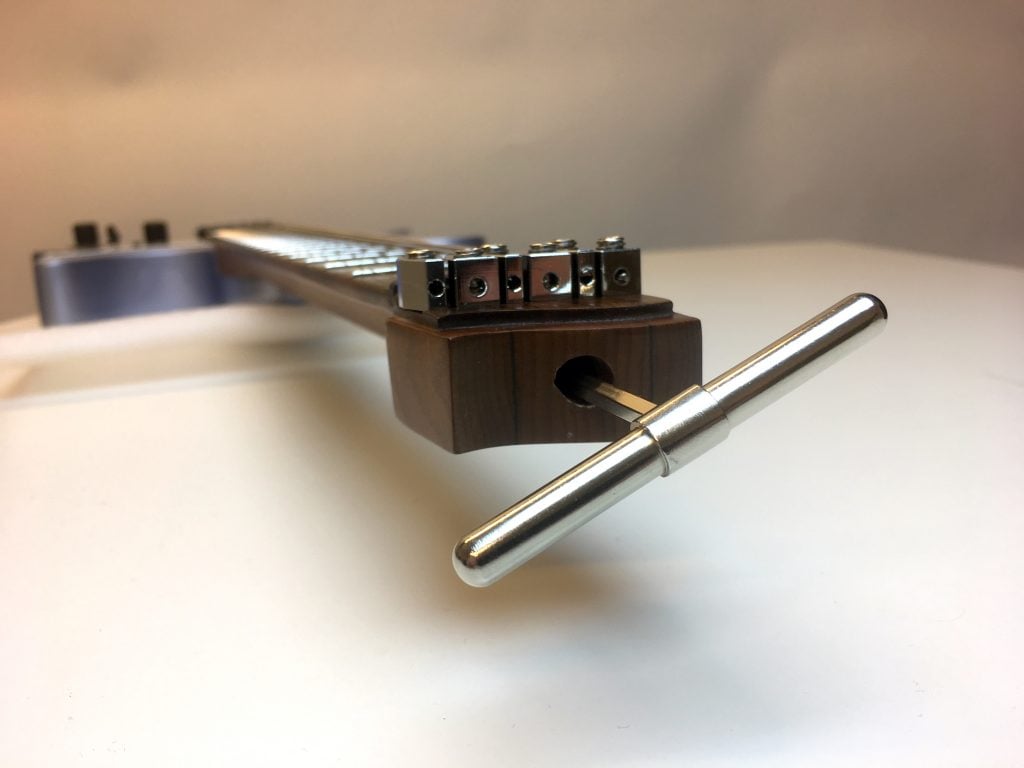
The truss rod on a .strandberg* instrument is adjusted by turning the truss rod bolt located inside the hole visible on the headstock. Turning of the bolt is done by means of the supplied 4 mm T Wrench.
To achieve maximum room for adjustments we equip our necks with so called “double expanding” truss rods which are effectively two truss rods in one. These two rods apply pressure in opposite directions from inside the neck as the bolt is turned either clockwise or counterclockwise from its neutral position. At the center of the truss rod’s rotation curve there will be no apparent resistance to be felt while turning. In this position none of the rods apply any pressure to the neck. Clockwise turns from here engages the first rod that counteract the strings and make the neck increasingly straight. Counterclockwise turns from the neutral position engages the second rod that cooperates with the strings in putting extra relief on the neck.
Why is a dual truss rod necessary, you might ask yourself?
In certain and rare situations, the combined force of the strings may not be sufficient to put enough relief on the neck by itself even with the common truss rod fully disengaged. This can be due to the use of light gauge strings, low tunings or generally any scenario that equals low string tension. Environmental situations that will cause the wood to expand also play an important role whenever the neck is found to be unusually straight. These are the situations where the second portion of the truss rod may be employed to help putting a healthy relief on the neck.
Achieving proper relief
Like mentioned earlier every situation equals a particular strain on the instrument neck. This means that we have to be able to detect when proper relief has been achieved by adjustments made to the truss rod. This also means that the relief have to be set with the intended strings and tuning present on the instrument.
Be sure to always check the relief with the intended strings and tuning in place.
Deviation from this is not harmful to the instrument but will obstruct optimum results and increase the likelihood of additional necessary adjustments. With the intended strings in place and the tuning checked we are ready to investigate the current state of relief on the neck.
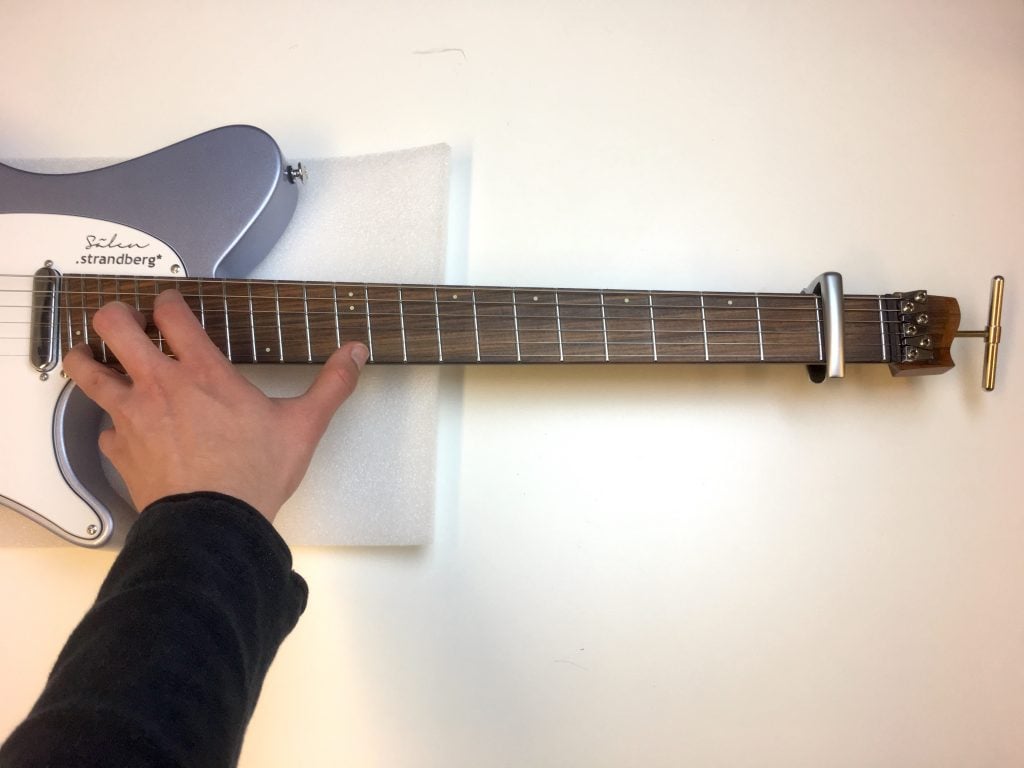
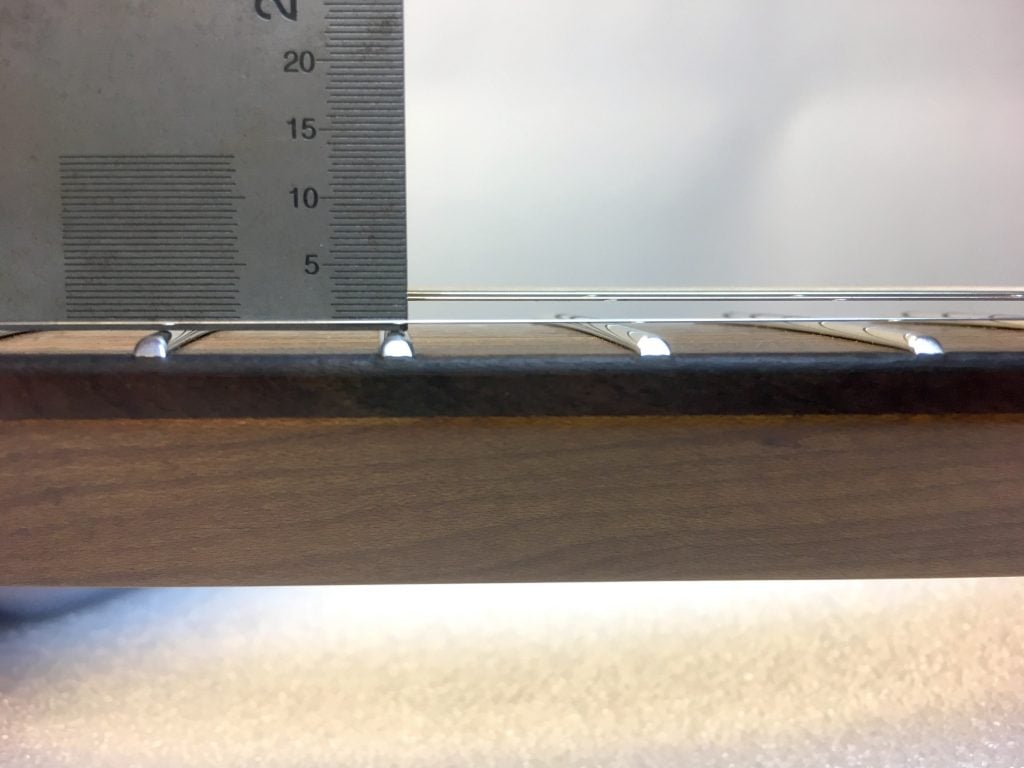
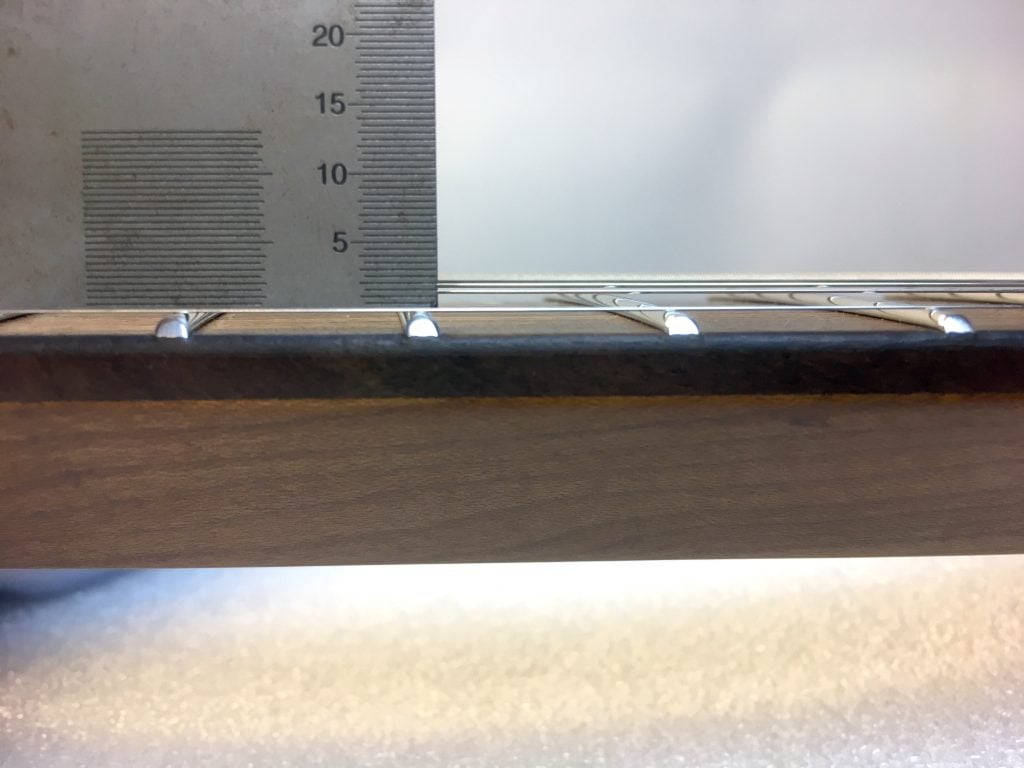
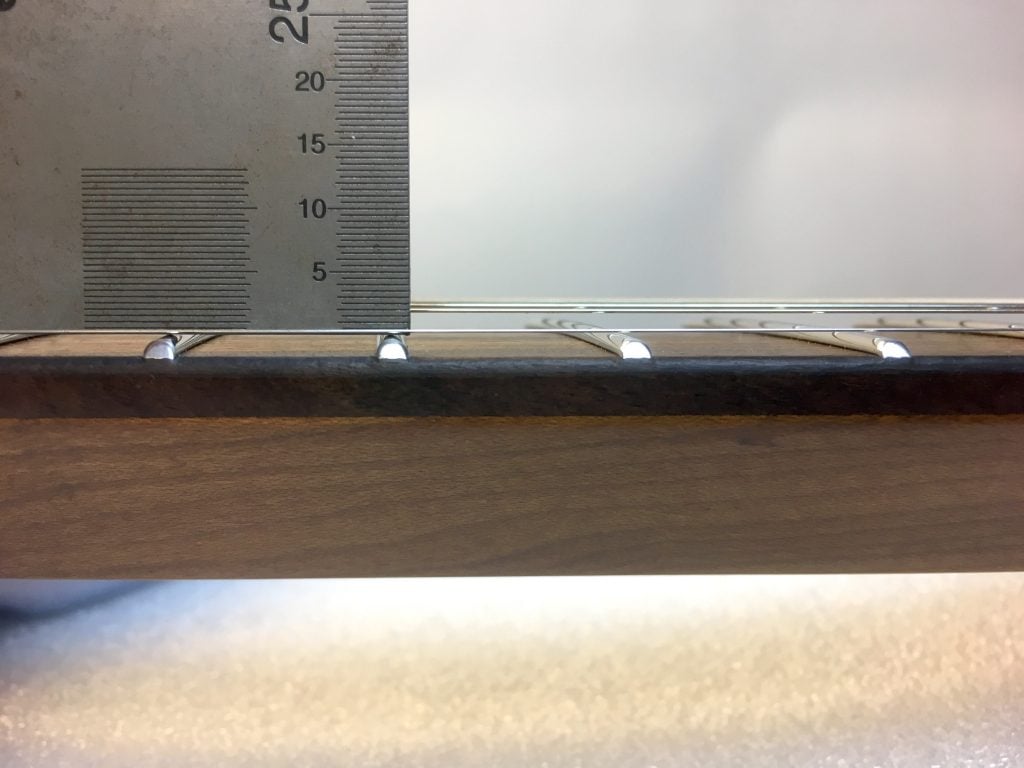
This is done by pressing down the first and last frets on the lowest string to isolate the curvature of the neck from the actual string height set at the bridge. An even easier way of doing this is to employ a capo placed on the first position of the neck to relieve one of your hands for measuring duty. While the string is pressed down in such a way, we observe the amount of gap between the lowest string and the 12th fret. If there is no visible air between the string and the fret, additional relief is required and achieved by counterclockwise turning of the truss rod bolt. If there is more than approximately 0,4 mm / 0,016 in of visible air between the string and the fret, the neck has too much relief and needs to be straightened by clockwise turning of the truss rod bolt.
Proper relief is obtained when the gap between the lowest string and the 12th fret roughly equals the thickness of a common business card.
Make sure to check the tuning in between turns whenever substantial adjustments are made!
Great changes in relief affects the tuning and we always want to set the relief for the intended tuning.
Conclusion
You now have the tools to keep the neck of your .strandberg* instrument healthy in terms of relief regardless of situation. Do not fear this procedure, but instead embrace it as your life of guitar and bass playing will be profoundly easier with this knowledge in hand.
All measurements given in this article are approximations and does not have to be followed to the letter. Whenever your instrument feels and sounds the way you desire, the correct relief has indeed been applied to the neck.
Happy adjusting!

Pin this image to save this article.


Share this: